Detailed Assembly of SV1 and SV2 Precision Power Scale kits using the Z-core This is a 2-hour build Use flush-cut cutters. Use thin solder and a conical tip iron. Use a 50-60W iron. Use a magnifier. Trim solder points as you go. Take your time. Take breaks. 1 – Sort the components Carefully sort the[…]
Category: Product Info
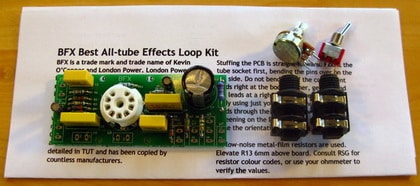
About Our Kits
London Power’s kits allow the hobbyist or amp builder to add features to an existing project or to build a new project from scratch. Each kit contains the circuitry relevant to itself. For example, a preamplifier kit contains the circuitry that makes up the audio signal path ONLY; the kit will require a power supply […]
About Power Press’s Tube Guitar Amp Books (and more!)
Tube Guitar Amp Books (and more!) by Kevin O’Connor Browse our Tube Guitar Amp Books In electronics and audio design, many circuit methods and topologies are available for any given goal. Most books present a single solution to a design problem, but Kevin O’Connor’s books offer many possibilities. Justified Approach It’s nice for a builder[…]
Power Scaling Kit Selection
The Cutting Edge of Power Scaling Technology from the Inventors of Power Scaling Selection Guidelines The first selection parameter is how the amplifier is biased: cathode bias or fixed bias. In general, this resolves to the following kit requirements: Fixed bias: SV1 + RBX Cathode bias: SV2 + VCK Switchable fixed/cathode bias: SV1 + RBX[…]
Power Scaling Kits: About
Learn about Power Scaling from Its Inventors Browse our Power Scaling products. The newest term in Power Scaling is “Super Versatile” (SV). Our SV-range of Power Scaling kits represents a breakthrough in performance and value, combining the sophistication of our former “Super Flexible” kits with the cost-performance of the “Super Budget” kits – so SV[…]
Other Retailers of Our Books
These fine businesses carry our books by Kevin O’Connor! IN THE USA Antique Electronic Supply 6221 South Maple Avenue Tempe, AZ 85283 USA Tel: 480-820-5411 Website: www.tubesandmore.com IN THE UK Bob Pearman Books 8 Ffolkes Place Runcton Holme Kings Lynn Norfolk PE33 0AH UK Tel: 01553 810673 Website: www.pearman-books.com IN CANADA The Tube[…]
Power Scaling Builders & Installers
LICENSED POWER SCALING BUILDERS These amplifier manufacturers are licensed by London Power to incorporate Power Scaling into their amplifier products, and to use the terms “Power Scale” and “Power Scaling.” CANADA STEPHENSON AMPLIFICATION POB 176 Parksville, BC V9P 2G4 250-954-2292 10am-5pm M-F Pacific Time www.stephensonamps.com Mark Stephenson was the first licensed Power Scaling amp builder.[…]
Sag/Sustain Kit Selection
What is Power Supply “Sag”? “Sag” is a well-known power supply effect caused by resistance in the supply and variable current loading. As an amplifier pulls more current from the supply, the supply voltage drops, or sags, and this can cause a compression effect. The transient or attack portion of a note is “squashed” or[…]
About Our Switching Kits

Switching Kits by London Power – Human-Scale Technology London Power‘s range of switching kits allows the player, hobbyist or builder to access amplifier channels, amp features and system configurations, using simple circuitry. All of our switching circuits are discrete so they can be repaired by anyone with average skill, and can be maintained for decades[…]
TUT Book Selection
Which “The Ultimate Tone” Volume to Get First? TUT – The Ultimate Tone, is an ongoing series of distinct books about guitar amp technology with a heavy focus on tube circuitry. Currently there are six volumes. You can buy the whole series as a package (TUT-DEAL) or buy just one or two at a time.[…]